How to Attract More Exhibitors to Your Trade Show
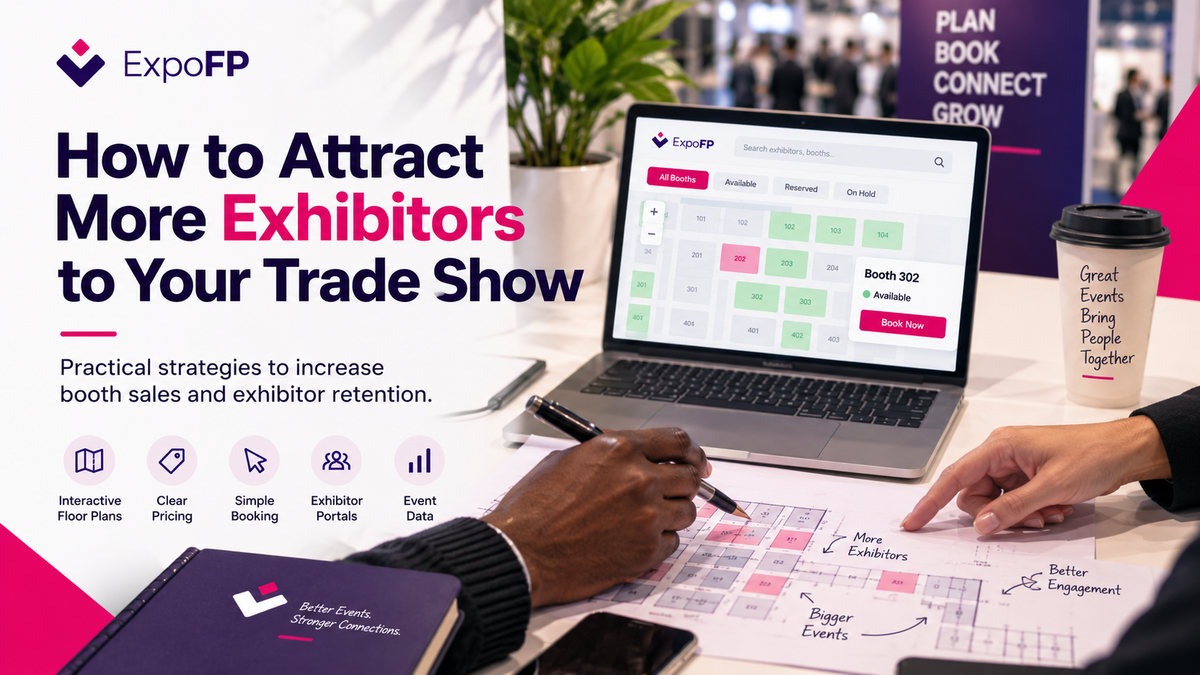
If you want to know how to attract exhibitors, start by making it easy for them to understand the value of your event and book their space. A live floor plan, clear pricing, self-service booking, and an easy rebooking process can help exhibitors make decisions faster.
This guide covers why exhibitors may decide not to book, what organizers can improve over the next 90 days, and how tools such as an interactive floor plan can help attract exhibitors and increase booth sales.
Why exhibitors say no
Before looking for new ways to attract exhibitors, it helps to understand what may be preventing them from booking. Common concerns often relate to pricing, booth availability, location, previous event results, or a booking process that takes too many steps.
| Objection you hear | What it may mean | What you can do |
|---|---|---|
| “Send me the floor plan” | They want to see available locations and pricing | Provide an interactive floor plan with live booth availability |
| “We need to think about the budget” | They need more information about pricing and booth options | Make pricing and booth options clear and easy to compare |
| “Last year didn’t work for us” | They may have concerns about location or event results | Share relevant event data and help them choose a better location |
| “We’re waiting on approvals” | Their internal approval process takes time | Offer clear deadlines and an option to temporarily hold a booth |
| “It’s too expensive for a first-timer” | They may be looking for a lower-cost option | Offer smaller booths or other entry-level options |
| Silence after a proposal | The booking process may involve too many steps | Make it easy to select a booth, complete the booking, and pay online |
Many of these concerns can be addressed by giving exhibitors clear information before they book. An interactive floor plan can help them see available booths, compare locations, and move forward with their booking more easily.
1. Make the interactive floor plan your primary sales asset
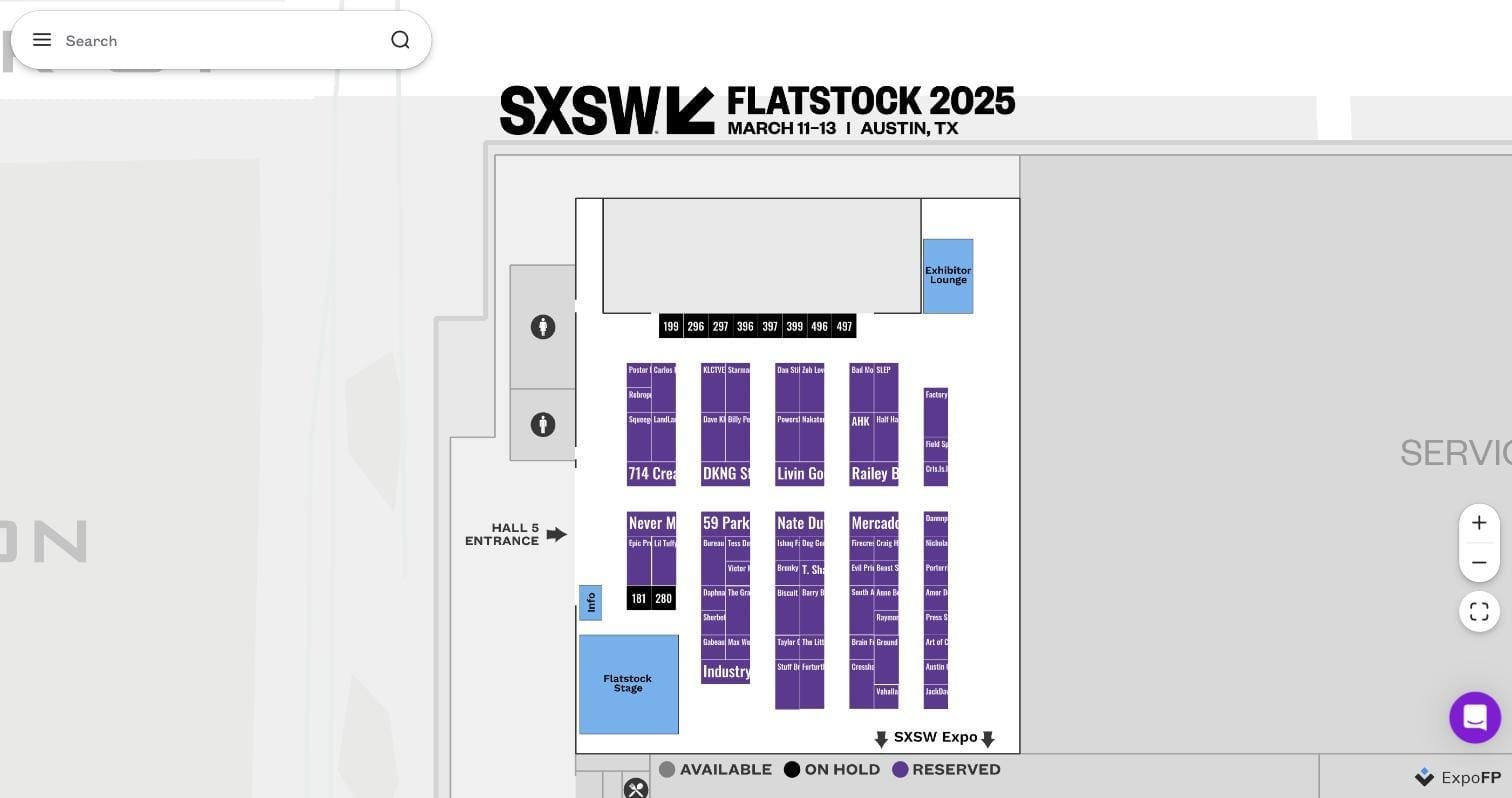
An interactive floor plan gives exhibitors an easy way to explore available booths and understand the event layout before booking. Unlike a static PDF, it can show current booth availability and provide exhibitors with up-to-date information as the floor plan changes.
A well-designed interactive floor plan can help exhibitors:
- See booth availability. Exhibitors can quickly identify which booths are available, reserved, or already booked.
- See nearby exhibitors. They can check which companies are located nearby and compare different booth locations.
- Understand the event layout. Entrances, registration areas, stages, catering areas, and other points of interest provide useful context when choosing a booth.
- Choose a booth more easily. Having the relevant information in one place makes it easier to compare options and move forward with a booking.
If you’re still deciding what an interactive plan actually is and what it replaces, our definition and benefits explainer covers the basics. For the mechanics of moving sales onto the map, see how to sell trade show booth space online without spreadsheets.
2. Make exhibit space pricing clear
Clear pricing helps exhibitors understand their options and choose a booth that fits their budget. You don’t need to publish every cost, but providing clear pricing information can make the decision and booking process easier.
Consider including:
- Price per square foot or square metre, when applicable
- Different pricing by booth type or location, such as corner, peninsula, or island booths
- What’s included in the booth price, such as carpet, power, listings, or badges
- Early-bird, standard, and other pricing periods, with clear deadlines
Our guide to pricing exhibit space covers how to build the zone map and set the premiums. Two structural notes for international shows: North American shows typically quote per square foot on a 10 × 10 ft (3.05 × 3.05 m) grid, while European shows quote per square metre, often with a separate charge for the shell scheme. If you sell into both markets, quote both units — see booth sizes and dimensions across the US and Europe.
3. Offer smaller options for first-time exhibitors
First-time exhibitors may not be ready to commit to a large booth. Offering smaller or more affordable options can make it easier for them to participate and become familiar with your event.
Some options to consider:
| Option | Typical size | Who it may work for |
|---|---|---|
| Table-top / pod | 6–8 ft table or 2 × 2 m pod | Startups, first-time exhibitors, local suppliers |
| Single inline | 10 × 10 ft / 3 × 3 m | Exhibitors looking for a smaller booth |
| Pavilion space | Shared area or grouped booths | Trade delegations, associations, regional groups |
| Corner booth | 10 × 10 ft corner booth | Exhibitors looking for additional visibility |
You can also group smaller booth options into a dedicated area, such as a Startup Area or Innovation Zone, making them easier for attendees to find on the floor plan. As exhibitors return to future events, you can introduce them to other booth sizes and locations that may better fit their needs.Group the entry tier into a clearly labelled zone on the plan — a “Startup Alley” or “Innovation Zone.” It sells better as a destination than as leftover space, and it gives you an obvious upgrade path next cycle. If you need the vocabulary for the upgrade conversation, inline, corner, peninsula and island explained lays out what each position actually buys.
4. Make it easy for exhibitors to rebook onsite
The event itself can be a good opportunity to start the rebooking process for the next edition. Exhibitors can evaluate their current booth location, attendee traffic, and nearby exhibitors while the experience is still fresh.
To make onsite rebooking easier:
- Have the next event’s floor plan available during the current event.
- Give exhibitors a clear way to discuss booth options with your sales team.
- Communicate any rebooking rules, deadlines, or priority periods in advance.
- Use the interactive floor plan to show available locations and help exhibitors compare their options.
- If applicable, offer incentives for exhibitors who rebook during or shortly after the event.
Starting the rebooking process early gives exhibitors more time to choose their preferred booth and can help organizers begin planning and selling the next event sooner.
5. Show exhibitors who they can reach
Exhibitors want to understand who attends your event and whether that audience is relevant to their business. Providing clear attendee information can help them evaluate the value of exhibiting.
Consider sharing information such as:
- Attendee job titles and seniority levels
- Industries and company sizes represented
- Geographic distribution of attendees
- First-time and returning attendee numbers
- Other relevant audience data available for your event
You can also use the interactive floor plan to provide more context about booth locations. Showing nearby exhibitors, event areas, stages, entrances, and available booths can help exhibitors choose a location that fits their goals.
6. Make the booking process simple
A simple booking process makes it easier for interested exhibitors to move forward. Try to reduce unnecessary steps and give exhibitors clear information about booth availability, pricing, and what happens next.
A typical process could include:
Select a booth on the floor plan → review pricing and details → reserve the booth → complete the required information → make a payment
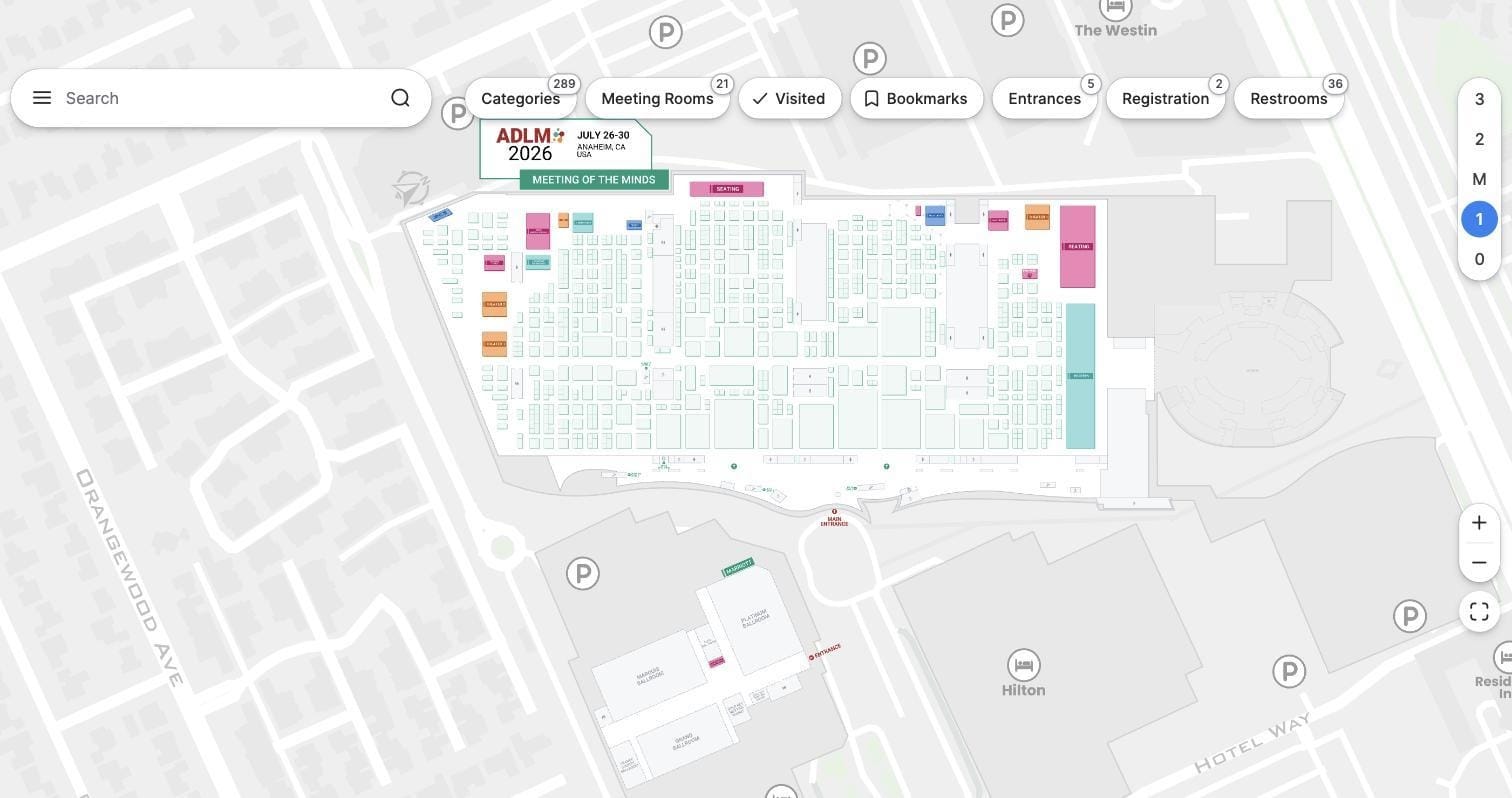
An interactive floor plan with online booth booking can help exhibitors see current availability and select a space without having to confirm available options separately with the organizer.
You can also offer a temporary booth hold, when appropriate, giving exhibitors time to complete internal approvals before confirming their booking.
7. Give exhibitors a self-service portal
A self-service exhibitor portal makes it easier for exhibitors to manage their information and can reduce administrative work for organizers. Instead of handling every update by email, exhibitors can manage their own profiles and keep their information up to date.
Depending on the tools available for your event, exhibitors can update information such as:
- Company name and description
- Logo and other images
- Contact information
- Categories and other profile details
Keeping exhibitor information up to date also improves the experience for attendees using the interactive floor plan and exhibitor directory, making it easier to find and learn more about participating companies.
8. Use event data to show exhibitor value
Event data can help exhibitors better understand the visibility and engagement they received during the event. When available, these insights can also support conversations about future participation.
Useful data may include:
- Floor plan views and searches
- Exhibitor profile views and interactions
- Booth bookmarks and wayfinding activity
- Traffic or navigation data available for different areas
- Feedback collected through post-event surveys
Sharing relevant event data gives exhibitors additional information to evaluate their participation and can help organizers have more informed conversations when planning the next event.
9. Design the floor plan to support attendee traffic
A well-planned event layout can help distribute attendee traffic across the show floor and give exhibitors better visibility throughout the venue.
When planning your floor plan, consider:
- Placing key attractions strategically to encourage attendees to explore different areas
- Positioning stages, catering areas, and other points of interest throughout the venue
- Avoiding long or isolated aisles that may receive less traffic
- Providing enough aisle space for attendees to move comfortably and explore exhibitor booths
Thoughtful floor plan design can improve navigation for attendees while creating a better experience for exhibitors. Our 12 floor plan design best practices guide covers more ways to plan an effective event layout.
10. Plan exhibitor recruitment with a clear timeline
Starting exhibitor recruitment early gives organizers more time to manage renewals, booth availability, pricing periods, and new exhibitor outreach. A clear timeline can also help exhibitors understand important dates and make booking decisions.
Our 18-month event planning timeline covers the full planning cycle. A typical exhibitor sales timeline may include:
| Months before the event | Exhibitor sales milestone |
|---|---|
| 12–18 | Prepare the floor plan, booth options, and pricing; begin renewals |
| 9–12 | Continue rebooking and launch early-bird pricing, if applicable |
| 6–9 | Focus on outreach to new and returning exhibitors |
| 3–6 | Continue booth sales and confirm remaining exhibitor opportunities |
| 1–3 | Manage remaining booth availability and final exhibitor updates |
| 0–1 | Finalize the floor plan and begin preparing for the next event cycle |
Your 90-day action plan
- ☐ Publish an interactive floor plan with live availability at a public URL
- ☐ Write a rate card with zone premiums and inclusions; put dates on the tiers
- ☐ Create one entry-level tier and give it a named zone
- ☐ Turn on booth holds with an expiry
- ☐ Build a one-page audience profile with real attendee data
- ☐ Open a self-service exhibitor portal for listings and logos
- ☐ Define renewal priority rules and publish them
- ☐ Book a staffed rebooking desk on the show floor for your next edition
- ☐ Set up listing-level analytics so you can report per-exhibitor numbers
- ☐ Audit your weakest zone and fix the layout cause, not the price
FAQ
How do I attract exhibitors to a brand-new show with no track record? Sell the audience acquisition plan instead of past results: your media partnerships, association endorsements, registration targets and marketing spend. Then de-risk the purchase — a small entry tier, a founding-exhibitor rate locked for two editions, and a published floor plan so prospects can see momentum as it builds. Anchor exhibitors who commit early are worth a discount because they make the floor credible to everyone after them.
What’s a realistic exhibitor retention rate? It varies enormously by sector and show maturity, so treat any single benchmark with suspicion. What matters is measuring your own rate consistently, segmenting it by booth size and zone, and investigating churn by location. A weak zone that loses exhibitors every year is a layout problem, not a sales problem.
Should I discount to fill the floor? Discounting is the fastest way to fill space and the fastest way to devalue it, because next year’s renewal starts from the discounted number. Prefer value levers that cost you less permanently: a location upgrade, extra badges, a sponsored session slot, or inclusion in a marketing package. If you must discount, tie it to a deadline so it reads as an early-bird rather than a negotiation.
How early should next year’s floor plan be live? Before the current show opens, if you intend to rebook onsite. Exhibitors decide about next year while they’re standing in this year’s hall, and they can’t decide without seeing the map.
Do exhibitors actually use interactive floor plans, or is it just for attendees? Both, for different reasons. Attendees use it to navigate; exhibitors use it during the buying decision to check neighbours, traffic patterns and what’s left, and during the show to point their own customers to the booth. In practice the exhibitor-facing use is the one that closes deals.
Fill your floor faster. Build a public, interactive floor plan with live availability, booth holds and online payment — no CAD skills required. Create your floor plan free.