Connecting Registration and Floor Plan: The Integration Guide for Event Organizers
Connect your event registration platform with an interactive floor plan to keep exhibitor, booth, attendee, and session data in sync. Learn the main integration methods, setup steps, and best practices for a smoother event experience.
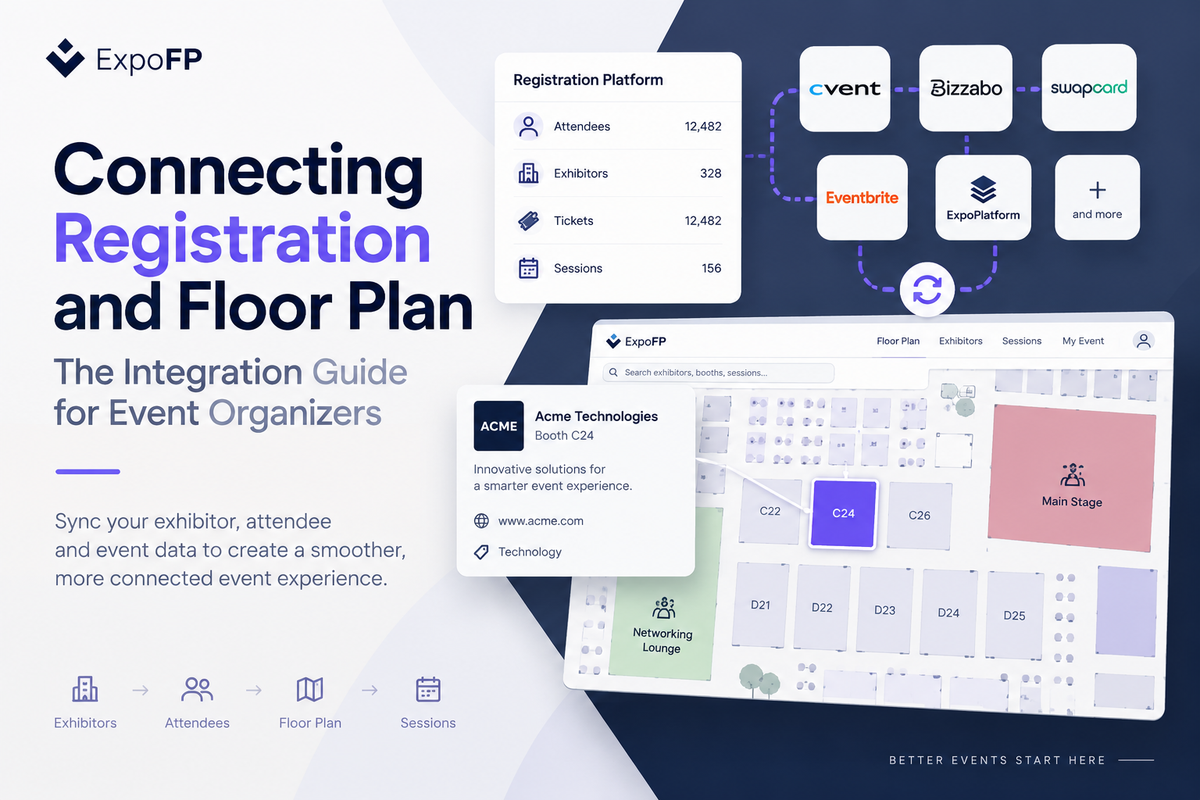
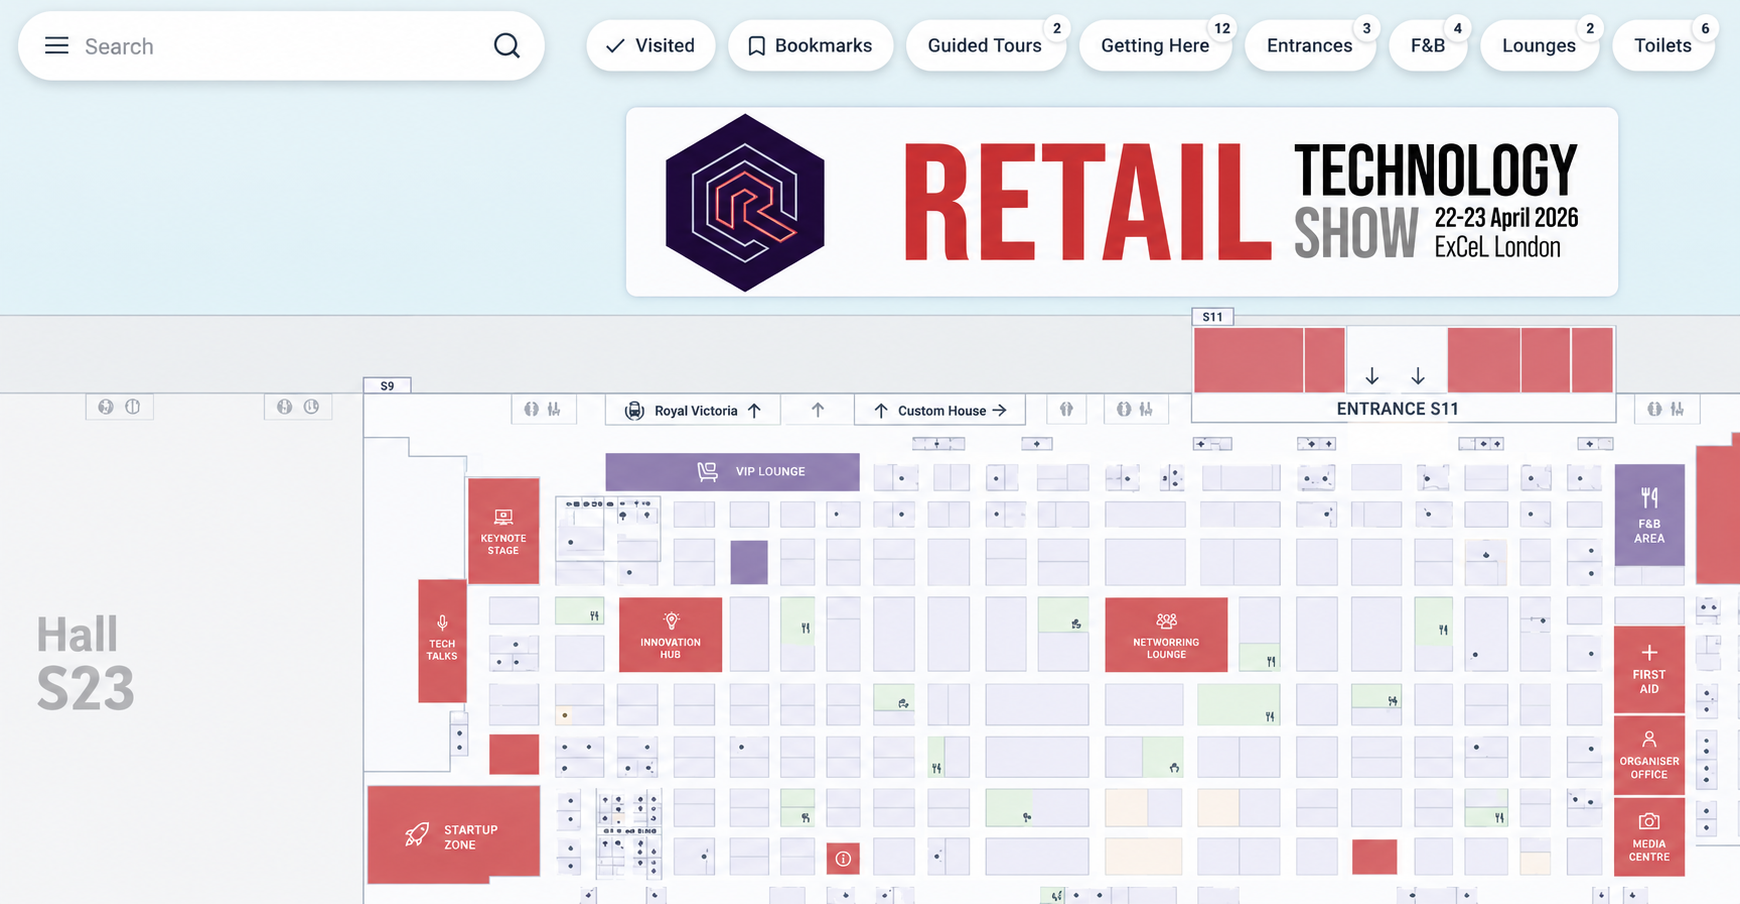
Event registration floor plan integration connects the system where exhibitors and attendees register — such as Cvent, Bizzabo, Swapcard, ExpoPlatform, Eventbrite, or a custom CRM — with your interactive event floor plan.
Instead of updating exhibitor information in multiple places, an integration keeps key data connected across your event systems. A booth assigned in your registration platform can appear on the floor plan, exhibitor information can stay consistent across platforms, and attendees can use the map to find exhibitors, sessions, and other important locations.
In this guide, we’ll look at what information can be integrated, how data can move between systems, the main integration methods available, and how to test everything before your event.
Why Registration and Floor Plan Integration Matters
Your registration platform contains important exhibitor and attendee data. Your floor plan shows where the event actually happens.
When these systems are disconnected, event teams often end up managing the same information in several places.
Outdated booth information
An exhibitor moves from one booth to another, but the change is only updated in the CRM. The website or interactive floor plan can continue showing the old booth number until someone updates it manually.
For exhibitors promoting their location before the event, even a small discrepancy can create confusion.
Repetitive manual updates
Without an integration, organizers may regularly export exhibitor data from one platform and import it into another.
For a small event, this may only take a few minutes. For an event with hundreds or thousands of exhibitors, keeping company names, logos, descriptions, and booth assignments synchronized can become a significant amount of manual work.
A disconnected attendee experience
Registration, event apps, exhibitor directories, agendas, and floor plans are often treated as separate tools.
Connecting them can create a more consistent attendee experience, allowing people to move from an exhibitor profile or session directly to its location on the interactive map.
The goal of an integration is simple: decide which system is responsible for each type of information and keep that information synchronized wherever it is needed.
What Data Can Be Connected?
Before choosing an integration method, identify which information needs to move between your systems.
Most event registration and floor plan integrations involve some combination of these five data types:
| Entity | Typical source of truth | Flows to | Key fields |
|---|---|---|---|
| Exhibitor / company | Registration or exhibitor CRM | Floor plan, event app | Company name, logo, description, website, categories, contacts |
| Booth / stand | Floor plan | Registration, invoicing, event app | Booth ID, hall, dimensions, type, price tier, status |
| Booth assignment | Either — decide once | Both | Exhibitor ID, booth ID, assignment date, contract status |
| Attendee | Registration | Floor plan / event app | Attendee ID, ticket type, interests, bookmarked exhibitors |
| Sessions / agenda | Agenda or event-app platform | Floor plan | Session ID, room or stage ID, start/end time, speakers |
One of the most important decisions is where booth assignments are managed.
There are two common approaches.
Pattern A: The Floor Plan Is the Sales Surface
Exhibitors select and reserve booths directly from the interactive floor plan. The reservation information can then be sent to your registration, CRM, or payment workflow.
This is the approach covered in How to Sell Trade Show Booth Space Online (Without Spreadsheets) and works particularly well when exhibitors are allowed to choose their own booth locations.
Pattern B: Registration or CRM Controls Booth Assignments
Your sales team assigns booths through the CRM or registration platform, and those assignments are then synchronized with the floor plan.
This can work better for events where booth placement is managed directly by the organizer, particularly when contracts, sponsorship packages, or priority systems determine where exhibitors are located.
Whichever approach you use, define one system as the source of truth for booth assignments. Allowing the same assignment to be independently edited in multiple systems can create conflicting information.
Floor Plan Integration Methods Compared
There are several ways to connect an event registration platform with an interactive floor plan. The right option depends on your existing event technology stack, how frequently information changes, and the technical resources available to your team.
| Method | How it works | Sync frequency | Setup effort | Best for |
|---|---|---|---|---|
| Native integration | The floor plan and event platform already have a connector | Near real-time or scheduled | Low | Organizers using supported platforms |
| iPaaS / no-code automation | Zapier, Make, or similar tools move records when an action occurs | Minutes | Low–medium | Small teams and custom workflows |
| API integration | Developers connect the floor plan API with another platform | Custom | Medium–high | Large events, custom portals, multi-event organizations |
| Scheduled file sync | CSV or Excel data is periodically imported | Daily or weekly | Very low | Smaller events or controlled update periods |
Native integrations are generally the simplest option when one is available.
ExpoFP, for example, can be connected with event platforms and automation tools such as Bizzabo and Zapier. The INBOUND ’23 case shows how ExpoFP and Bizzabo were used together, while How to Automate Event Management with Zapier covers automation possibilities with Zapier.
For custom workflows, ExpoFP also provides REST API and JavaScript API options through developer.expofp.com.
A file-based workflow can also be perfectly suitable for smaller events. If exhibitor information only changes a few times per day, a controlled CSV or Excel import may be simpler than building a custom API integration.
How to Connect Registration and an Interactive Floor Plan
Step 1. Finalize Booth Numbers First
Before connecting your systems, establish a consistent booth numbering structure.
The booth identifier on your interactive floor plan needs to match the booth identifier used by the connected platform.
For example:
- B-12
- B12
- B 12
These may look similar to a person, but they are different identifiers to an integration.
Our guide to Booth Numbering Systems covers different approaches to organizing booth numbers.
Once booth numbers are being used across your event systems, avoid changing them unless necessary. If the layout changes significantly, keeping a record of old and new booth IDs can make updates easier to manage.
Step 2. Decide Which System Owns Each Field
Create a simple source-of-truth table before configuring the integration.
For example:
| Field | Owner | Notes |
|---|---|---|
| Company name, logo, description | Registration / exhibitor portal | Exhibitor information can flow to the map and event app |
| Booth dimensions and type | Floor plan | Booth geometry is managed on the map |
| Booth price tier | Floor plan or CRM | Choose one source |
| Booth assignment | Registration / CRM | Useful for sales-managed booth allocation |
| Categories / product tags | Registration | Can be used for map filters |
| Session room locations | Floor plan | Agenda can reference map locations by ID |
The exact setup will vary by event. What matters is that each field has a clear owner.
Step 3. Map Your Fields
Once the source of truth is established, determine how each field corresponds between platforms.
A few areas deserve particular attention:
- Multiple contacts per exhibitor. Your registration system may contain several staff members while the public floor plan only needs selected contact information.
- Logo formats. Make sure images imported from another platform use formats and sizes supported by the floor plan.
- Categories. Keep product and exhibitor categories consistent if they are being used as filters.
- Shared booths and co-exhibitors. Make sure the workflow accounts for multiple companies assigned to the same booth.
- Multi-booth exhibitors. Some exhibitors may occupy multiple stands, potentially across different halls.
Testing these cases before importing your complete exhibitor list can prevent larger cleanup work later.
Step 4. Choose the Sync Direction
For each type of information, decide whether the integration is one-way or two-way.
For example, an event could use:
- Exhibitor profiles: registration → floor plan
- Booth assignments: CRM → floor plan
- Booth inventory: floor plan → CRM
- Attendee activity: event app / floor plan → analytics
The exact direction depends on your workflow.
In many cases, keeping individual fields one-way is easier to manage than allowing the same information to be changed independently in both systems.
Step 5. Connect the Attendee Experience
Exhibitor and booth data are usually the first integration priority, but attendee-facing connections can make the interactive map significantly more useful.
Depending on your event technology stack, integration can support:
- Personalized maps. Attendees can access saved exhibitors or relevant locations.
- Pre-event planning. Exhibitors or sessions bookmarked before the event can remain available onsite.
- QR code wayfinding. Entrance-specific QR codes can open the interactive map from a particular starting point. See QR Code Wayfinding at Events.
- Connected exhibitor information. Attendees can move between exhibitor profiles and their locations on the map.
Technically, this can be handled through URLs, identifiers, or an embedded floor plan inside an event website or app.
ExpoFP’s JavaScript API can be used when the interactive floor plan needs to work inside another platform or custom event experience.
Step 6. Connect Sessions and Locations
Floor plan integration does not have to stop with exhibitor booths.
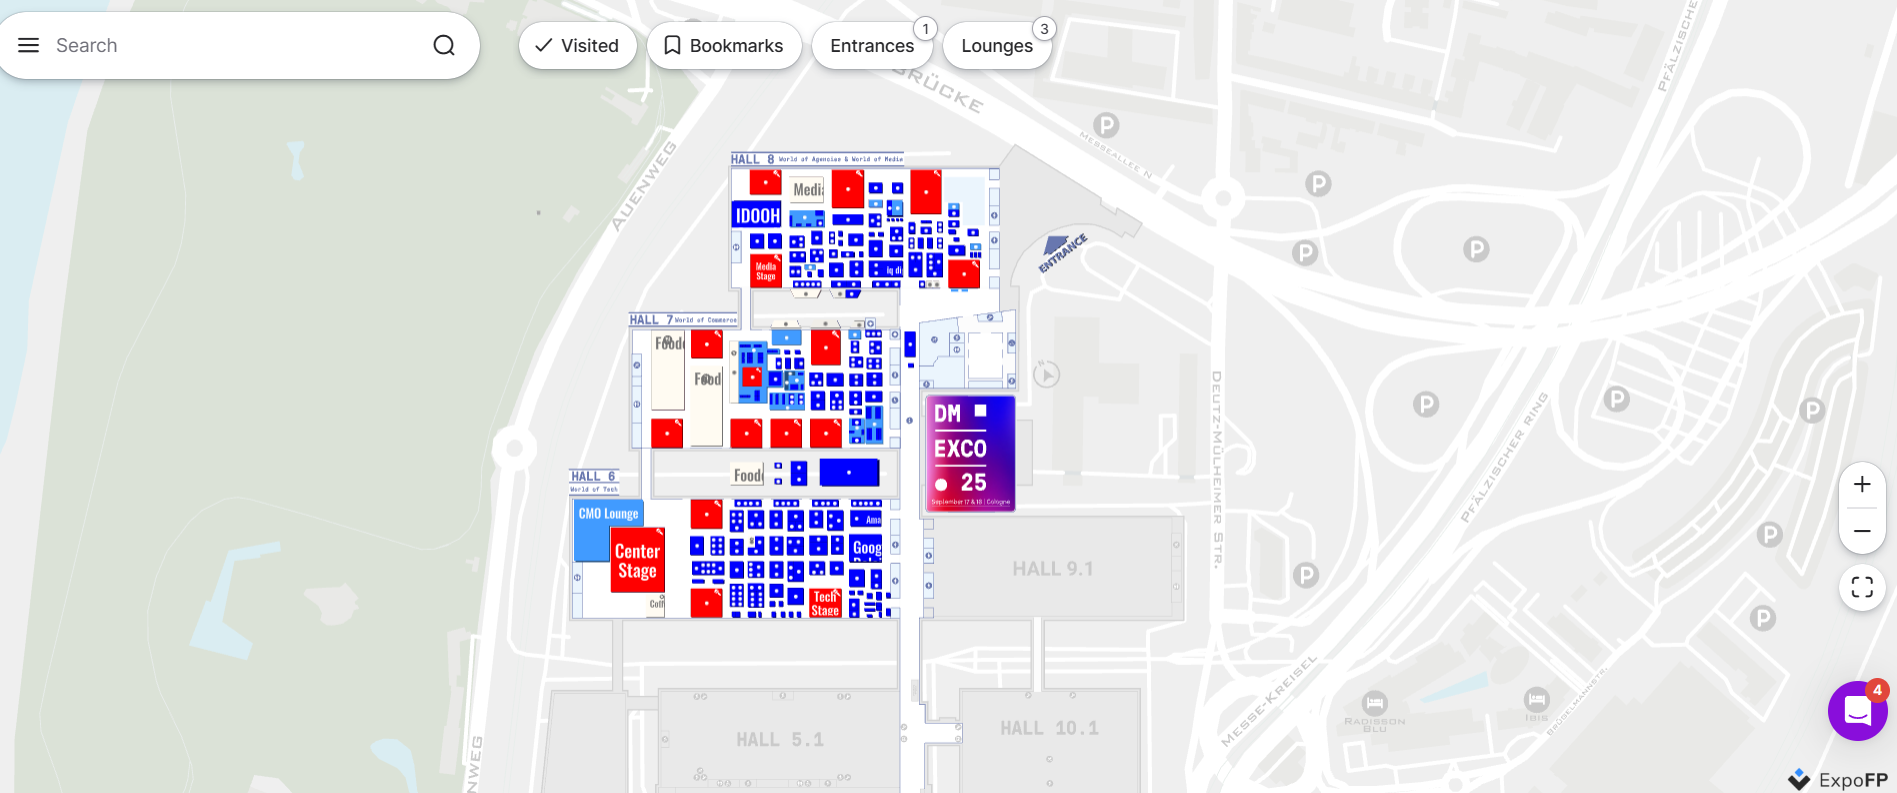
Stages, theaters, meeting rooms, lounges, and other locations can also be connected to your event agenda.
One approach is to assign each location on the floor plan an ID and store the same ID with the corresponding session or room in the agenda platform.
An attendee viewing a session can then open its location directly on the map instead of searching manually for a room name.
This is especially useful for large events spread across several halls or floors.
Step 7. Test With Real Event Data
Before launching the integration, test it using the same type of data that will be used during the event.
A practical test can include:
- Importing your complete exhibitor list and checking for unmatched records.
- Changing an exhibitor name and confirming that it updates correctly.
- Reassigning an exhibitor to another booth and checking both booth statuses.
- Adding a co-exhibitor to an existing booth.
- Canceling or removing an exhibitor and checking what happens to the booth.
- Testing the attendee-facing map using different user types.
- Testing the floor plan on the devices and connections attendees are likely to use onsite.
Testing edge cases is particularly important. A basic integration may work correctly for one exhibitor and one booth while producing unexpected results with shared stands or exhibitors occupying multiple locations.
Step 8. Create a Pre-Event Update Plan
As the event approaches, consider reducing the number of people who can make changes to important booth and exhibitor information.
Instead of allowing updates from several systems at once, many organizers use a controlled workflow during the final days before the event.
Also establish a fallback process.
If an integration temporarily stops working onsite, your team needs to know:
- where information can be updated manually;
- which system currently contains the correct data;
- whether the next synchronization could overwrite a manual change.
Documenting this process before move-in makes last-minute updates much easier to manage.
Integration Patterns by Platform Type
Event Apps and Engagement Platforms
Platforms such as Bizzabo, Swapcard, ExpoPlatform, and Grip often act as the attendee-facing environment for the event.
The interactive floor plan can be embedded or linked from the platform, while exhibitor information and session locations are connected with the map.
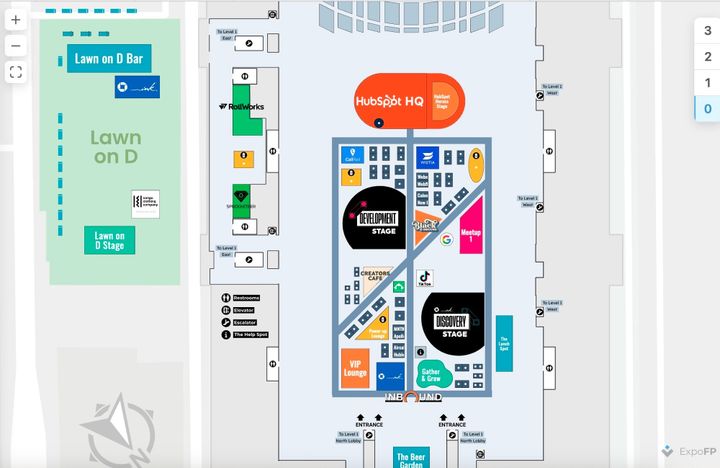
At INBOUND, for example, the Bizzabo–ExpoFP integration allowed exhibitor information managed in Bizzabo to appear on the ExpoFP floor plan.
Enterprise Registration Platforms
Platforms such as Cvent, RainFocus, and custom registration systems often serve as the main source for attendee and exhibitor information.
For more complex implementations, organizers can use APIs to connect these systems with the interactive floor plan.
The exact workflow depends on which platform controls exhibitor profiles, booth assignments, attendee identity, and other event data.
Ticketing Platforms
Ticketing-focused platforms such as Eventbrite and Ticket Tailor primarily manage attendee registration rather than exhibitor operations.
In this type of setup, exhibitor and booth information may remain within the floor plan or exhibitor-management platform, while ticketing handles attendee information.
Automation tools such as Zapier can help connect individual steps where necessary.
Exhibitor Management Platforms
Exhibitor portals collect information such as company descriptions, logos, contact details, and staff registrations.
Connecting this information with the interactive floor plan means exhibitors can update their profiles in one place while organizers keep the map current.
The same information can also be used across kiosks and digital signage. See our Trade Show Kiosks & Digital Signage Buyer’s Guide for more on onsite displays.
Common Floor Plan Integration Mistakes
Integrating Too Late
Connecting systems after booth sales are already well underway can mean reconciling months of changes.
Whenever possible, define the integration and booth IDs before booth assignments begin.
No Clear Data Owner
If nobody knows which platform contains the correct version of a field, inconsistencies are difficult to resolve.
Document the source of truth for important data and make sure the relevant teams know where updates belong.
Treating the Floor Plan as Just a Design File
A CAD drawing or static PDF is useful for designing the venue, but it cannot provide the same connected experience as an interactive map.
Moving to an interactive floor plan earlier in the planning process makes it possible to connect booth and exhibitor information before the event.
Ignoring Attendee Privacy
Personalized attendee information can involve personal data and privacy requirements.
If attendee information or activity is being shared between platforms, review the applicable privacy requirements and clearly define what information is collected and how it is used.
Synchronizing More Data Than Necessary
Not every field needs to exist in every platform.
Start with the information that directly improves your event workflow or attendee experience. A smaller, reliable integration is usually easier to maintain than a complex one with unnecessary fields.
Event Registration and Floor Plan Integration Checklist
Before launching your integration, check that:
- ☐ Booth numbering is finalized and consistent between systems
- ☐ The source of truth is defined for each important field
- ☐ Field mapping includes logos, categories, co-exhibitors, and multi-booth exhibitors
- ☐ The integration method is selected
- ☐ Sync direction is defined for each type of information
- ☐ Attendee-facing connections have been tested, where applicable
- ☐ Stages and rooms use consistent identifiers if connected to the agenda
- ☐ Real event data has been tested
- ☐ A pre-event update process and fallback procedure are documented
- ☐ Someone is responsible for monitoring the integration
- ☐ Privacy requirements have been reviewed for attendee data
Frequently Asked Questions
Do I need a developer to integrate registration with a floor plan?
Not always.
If your platforms already have a native integration or your workflow can be handled through a tool such as Zapier, the setup may not require custom development.
Developers are more likely to be involved when you need a custom API integration, an in-house registration system, SSO, or a more complex embedded experience.
Which system should control booth assignments?
Either your floor plan or your CRM/registration platform can control booth assignments, but it is best to define one as the primary source.
If exhibitors select booths directly from the map, the floor plan can be the source. If your sales team assigns booths as part of the sales process, your CRM or registration system may be a better fit.
How often should exhibitor information sync with the floor plan?
It depends on how frequently your event data changes.
During active booth sales, more frequent updates can keep exhibitor information current. As the event approaches, a more controlled update process can reduce the risk of last-minute inconsistencies.
Can attendees use a personalized interactive map without downloading an app?
Yes.
A web-based interactive floor plan can be connected to other event systems and accessed through a browser. Depending on the integration, attendee-specific information can be passed to the map without requiring a standalone mobile app.
What happens if we change registration platforms next year?
A well-documented integration makes changing platforms easier.
If your booth IDs, field mappings, and source-of-truth rules are clearly documented, the new platform can be mapped to the existing floor plan structure rather than rebuilding the entire workflow from scratch.
Ready to connect your event data with an interactive map? Create your floor plan free and explore ExpoFP integrations, automation options, and APIs.